 |
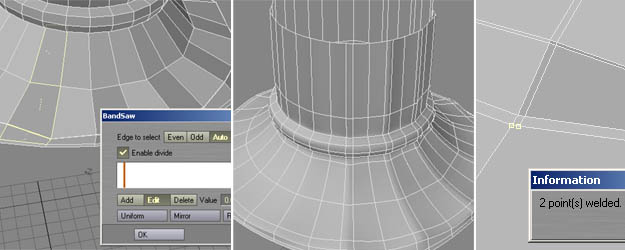
The ridges need to be somewhat sharper, so we'll Bandsaw again. Hide all the polys you don't want to be affected by the bandsawing process and start with the first ridge. Repeat this for all the others. Notice how they got sharper? Out of SubPatch mode unhide all and merge points as shown. Again repeat this all around the neck. |
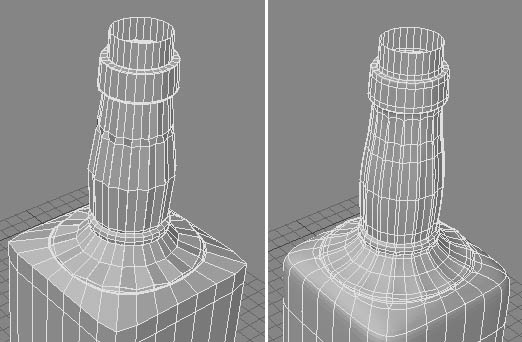 |
After some more extending and scaling/stretching your bottleneck should look similar to this. (I bet you can do it on your own now...) |
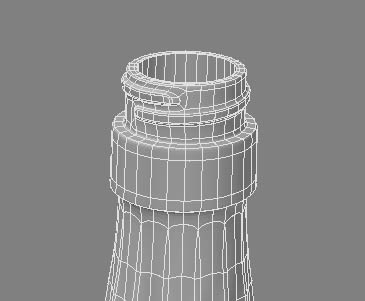 |
You can add even more detail if you plan to render the bottle opened... |
Ok, some considerations concering refraction. If light travels from one medium into another, it will change it's direction; it's being bent. The angle depends on the materials and is described by the so called "refraction-index". In perfect vacuum, the refraction index (RI) is 1.0, air has an RI of 1.003 and glass 1.5. So, applied to our bottle, the light will travel from air to glass to air (or whiskey if it's not empty), or: 1.003 -> 1.500 -> 1.003. To achieve proper refraction, we need to not only have a glass surface, but also an air surface facing the opposite direction of the glass surface (you guessed it; NO doublesided surfaces). And of course our bottle needs to have an interieur. So let's get it on with this one. |
 |
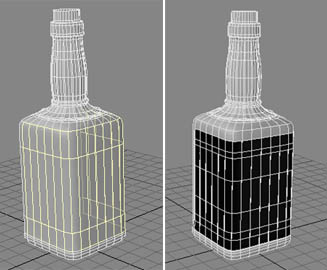
Just select the polys as shown above, copy them to a new layer and
flip them. It's always a good idea to name your layers to keep things organaized.
I suggeste something like "Bottle.Outside" and "Bottle.Inside" here.
Now do a SmoothScale of 5mm (if you used another scale, the value will differ).
You can now continue to extend/scale/stretch throughout the neck-area. |
 |
Time to attach the labels. This is easy; just copy some polys of the Bottle.Outside layer to a new one (Labels), make a cut using the knife-tool close to the top and one close to the bottom to match the shape of the original. Two more cuts inbetween, that's it. Well not really; the front side of the label is mostly black with white writing on it, while the side that is glued to the glass is white. So we need a flipped copy of the label. The neck wrapper is simply a copy of some neck-polys SmoothScaled 100um and altered so that it doesn't fit the neck too tight. I will leave also the back-label to you... To fill the bottle with wgiskey, just cut some Air.Inside polys and paste them to a new layer, now only close the top with manually created polys and you're done |
previous |
next |