As I have mentioned before, I will focus mainly on the surfacing part, but nevertheless will try to provide you with a good start for the modeling. If you don't want to model it yourself and/or want to study the objects, surfaces and scene in depth, download it all in a zip-file by clicking on thr image below. |
||||||||||||||||||
 |
||||||||||||||||||
Actually the modelling ain't too difficult once a minimum of planning is done. |
width | = | 8.10 cm |
depth | = | 8.10 cm |
height (total) | = | 24.90cm |
height (neck) | = | 11.40cm |
max. diameter / neck | = | 3.50 cm |
diameter / cap | = | 3.00 cm |
...and off we go
We have now gathered enough information to finally start modeling. Let's make three boxes based on the measurements we just took. They will serve as a reference when put on a background layer.
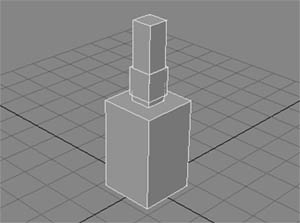
By eyeballing we will immediately see when our model gets too far off. This should be sufficient as far as accuracy is concerned.
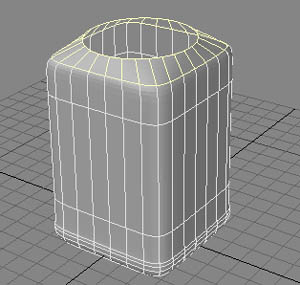
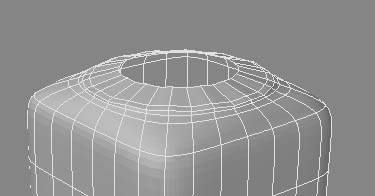
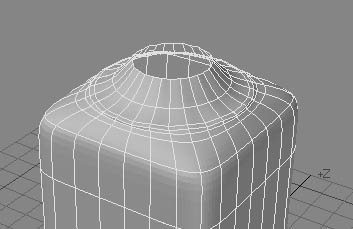
Now to start with the actual bottle, create a box with 7 segments on each X- and Z-Axis, but only 1 segment on the Y-Axis. Select the bottom polygon and bevel it a few times to model the, well, bottom of the bottle. Delete both the top- and bottom-poly. Enter SubPatch-mode by pressing TAB. In Top-View select the corner-points and stretch them to round off the edges. Create a 28-point circle just over the box and connect it to the latter by manually making polygons (be sure to have all normals facing outward).
Repeat the last step for the bottom to close it. A following bandsaw will produce a more noticeable edge. The next step will target the most delicate section...
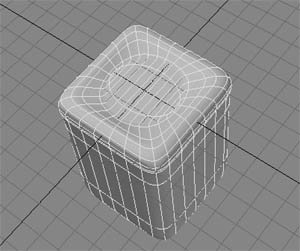
...the neck itself. Select the topmost points and extend them first upwards. Now select every second point and move them up a bit. This will become the ridges. Another extension has to be made, but this time inwards. Now select the polys created during the first extension and Bandsaw them, using two subdivisions close to the edges to pronounce them.
Here's the model after another extension. Next we will do the ring.
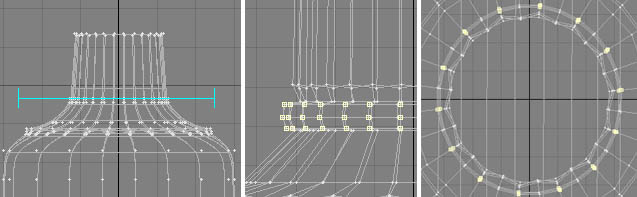
Do one more extension and move the points upward quite a bit. We'll use the knife-tool to model our ring. Cut through the neck of the bottle (!) 5 times. Select the points of the middle 3 cuts and sretch them outward. In top-View deselect every 2nd group of points and stretch the remaining ones to get a circular shape again.
next |